How to Teach Seed Germination with Kids (Simple, Hands-On Science)
Teaching seed germination is one of the easiest and most effective science lessons for young children. It’s visual, fast, inexpensive, and builds foundational understanding of how plants grow.
This guide walks you through exactly how to teach seed germination to preschool and early elementary students in a clear, manageable way.
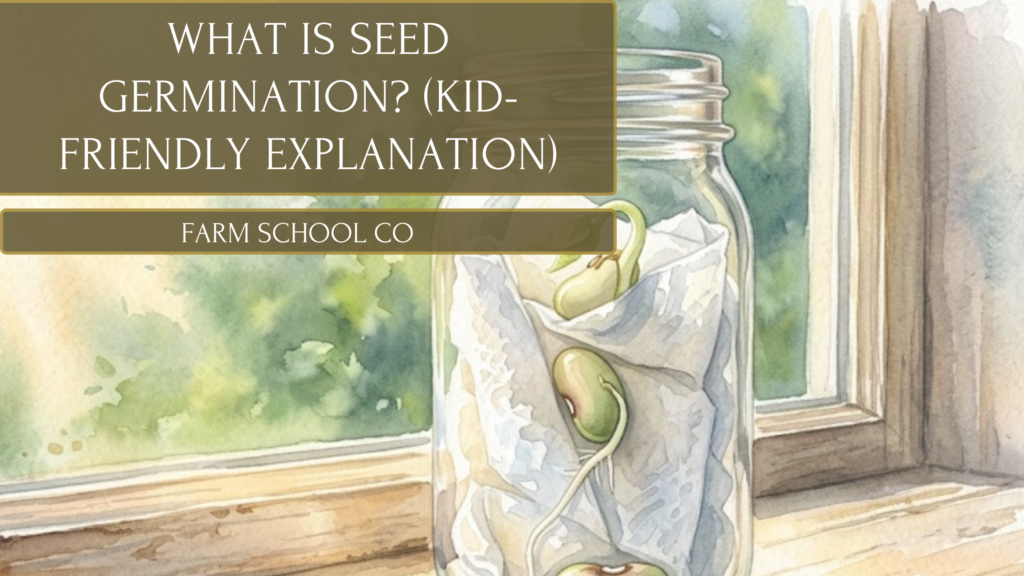
What Is Seed Germination? (Kid-Friendly Explanation)
Seed germination is the process of a seed beginning to grow into a plant.
In simple terms:
A seed wakes up, grows roots, and starts reaching toward the sun.
Children do not need technical vocabulary at first. Focus on the idea that seeds need:
- Water
- Air
- Warmth
Sunlight becomes important after sprouting begins.
The Easiest Seed Germination Experiment for Kids
The classic lima bean in a bag experiment is ideal because kids can see the roots form.
Materials
- Lima beans (dry)
- Paper towels
- Clear zip-top bags
- Spray bottle with water
- Tape
- Window with indirect sunlight
Step-by-Step Instructions
1. Soak the Beans
Optional but helpful: soak beans in water for 8–12 hours to speed up sprouting.
2. Prepare the Paper Towel
- Dampen (do not soak) a paper towel.
- Fold it to fit inside the bag.
3. Add the Seeds
- Place 1–3 beans between the towel and the plastic.
- Seal the bag.
4. Tape to a Window
- Tape the bag to a window with indirect light.
- Keep it warm.
5. Observe Daily
Within 2–5 days, you should see:
- The seed coat split
- A tiny root (radicle) emerge
- A small shoot begin forming
Have children draw what they see each day.

What Kids Learn from a Germination Experiment
This activity supports multiple skills:
Science Concepts
- Life cycles
- Basic plant biology
- Cause and effect
Observation Skills
- Tracking changes over time
- Comparing growth
Early Literacy
- Labeling diagrams
- Dictating observations
Fine Motor
- Handling seeds
- Drawing daily observations
Keep the lesson concrete. Let them see it happen.
Questions to Ask During the Experiment
Use simple prompts:
- What changed today?
- Do you see roots or leaves first?
- Why do you think the seed split open?
- What do you think will happen tomorrow?
Avoid overexplaining. Let curiosity drive discussion.
How to Extend the Lesson
If your child shows interest, add one of these extensions:
1. Compare Conditions
Try three bags:
- One without water
- One in a dark cabinet
- One in a cold room
Discuss what happens.
2. Transfer to Soil
Once roots appear, plant the sprouted seed in soil and continue observing growth.
3. Create a Germination Journal
Have children:
- Draw daily changes
- Label parts (root, stem, leaf)
- Record the number of days until sprouting

Best Seeds for Teaching Germination
While lima beans are popular, you can also use:
- Pinto beans
- Green beans
- Peas
- Sunflower seeds
Choose large seeds for younger children. They’re easier to observe.
Common Mistakes to Avoid
- Overwatering (paper towel should be damp, not dripping)
- Placing in direct, hot sunlight
- Forgetting daily observation
- Waiting too long to transfer to soil
Keep it simple. Monitor daily.
How Long Does Germination Take?
Most beans sprout within:
- 2–5 days for visible roots
- 5–10 days for shoots
Exact timing depends on temperature and moisture.
This quick turnaround makes it ideal for preschool and early elementary.

Why Seed Germination Is a Powerful Early Science Lesson
This experiment teaches more than plant growth.
It builds:
- Patience
- Observation habits
- Scientific thinking
- Wonder
And it requires minimal preparation.
You do not need a formal science curriculum to teach meaningful biology at this stage. A clear experiment, simple vocabulary, and daily discussion are enough.
If you’d like an immersive germination experience including experiments, activities, and art, get our full germination nature study.